Kubernetes The Hard Way: Part 4 - Bootstrapping etcd and the Control Plane
Wiring the Brain: Installing and Debugging the Core Components of Kubernetes

In this hands-on deep dive, we'll continue our journey through "Kubernetes The Hard Way" by bootstrapping etcd and the Kubernetes control plane components. This is where the magic starts to happen!
The Challenge: Building the Brain of Kubernetes
In previous parts of this series, we set up our infrastructure and generated the necessary certificates. Now comes the exciting part - actually getting Kubernetes components running! Today, we'll focus on:
Bootstrapping etcd - Kubernetes' distributed key-value store
Setting up the Kubernetes control plane - the brain of our cluster
These components form the foundation of our Kubernetes cluster, and understanding how they work together is critical for troubleshooting and maintaining production environments.
Hands-On Implementation
Part 1: Bootstrapping etcd
Let's start by looking at the etcd service unit file - it packs a lot of information about how etcd works!
[Unit]
Description=etcd
Documentation=https://github.com/etcd-io/etcd

[Service]
Type=notify
ExecStart=/usr/local/bin/etcd \
  --name controller \
  --initial-advertise-peer-urls http://127.0.0.1:2380 \
  --listen-peer-urls http://127.0.0.1:2380 \
  --listen-client-urls http://127.0.0.1:2379 \
  --advertise-client-urls http://127.0.0.1:2379 \
  --initial-cluster-token etcd-cluster-0 \
  --initial-cluster controller=http://127.0.0.1:2380 \
  --initial-cluster-state new \
  --data-dir=/var/lib/etcd
Restart=on-failure
RestartSec=5

[Install]
WantedBy=multi-user.target
Let's break this down:
--name controller: This gives our etcd instance a unique name. In a multi-node etcd setup, each instance needs a unique identifier.
--initial-advertise-peer-urls and --listen-peer-urls: Defines how etcd instances communicate with each other (on port 2380)
--listen-client-urls and --advertise-client-urls: Defines how clients (like the Kubernetes API server) connect to etcd (on port 2379)
--initial-cluster: Lists all etcd members in the cluster (in our case, just one)
--data-dir: Specifies where etcd stores its data
I was initially confused by the statement "Each etcd member must have a unique name within an etcd cluster." In our setup, we're running etcd on a single "server" instance representing the control plane. In a production environment, you'd typically have multiple control plane nodes, each running etcd with a unique name for high availability.
The command chmod 700 /var/lib/etcd ensures only the root user can access etcd's data directory - an important security practice since etcd stores sensitive cluster data.
After starting etcd with the systemd commands:
{
  systemctl daemon-reload
  systemctl enable etcd
  systemctl start etcd
}
These commands:
Reload systemd after adding the new unit file
Configure etcd to start on boot
Start the etcd service immediately
We can verify it's running:
etcdctl member list
6702b0a34e2cfd39, started, controller, http://127.0.0.1:2380, http://127.0.0.1:2379, false
I tested etcd's functionality by storing a value:
root@server:~# etcdctl put mykey "yo!"
OK
root@server:~# etcdctl get mykey
mykey
yo!
Great! etcd is up and running. This distributed key-value store will hold all of our cluster's state information.
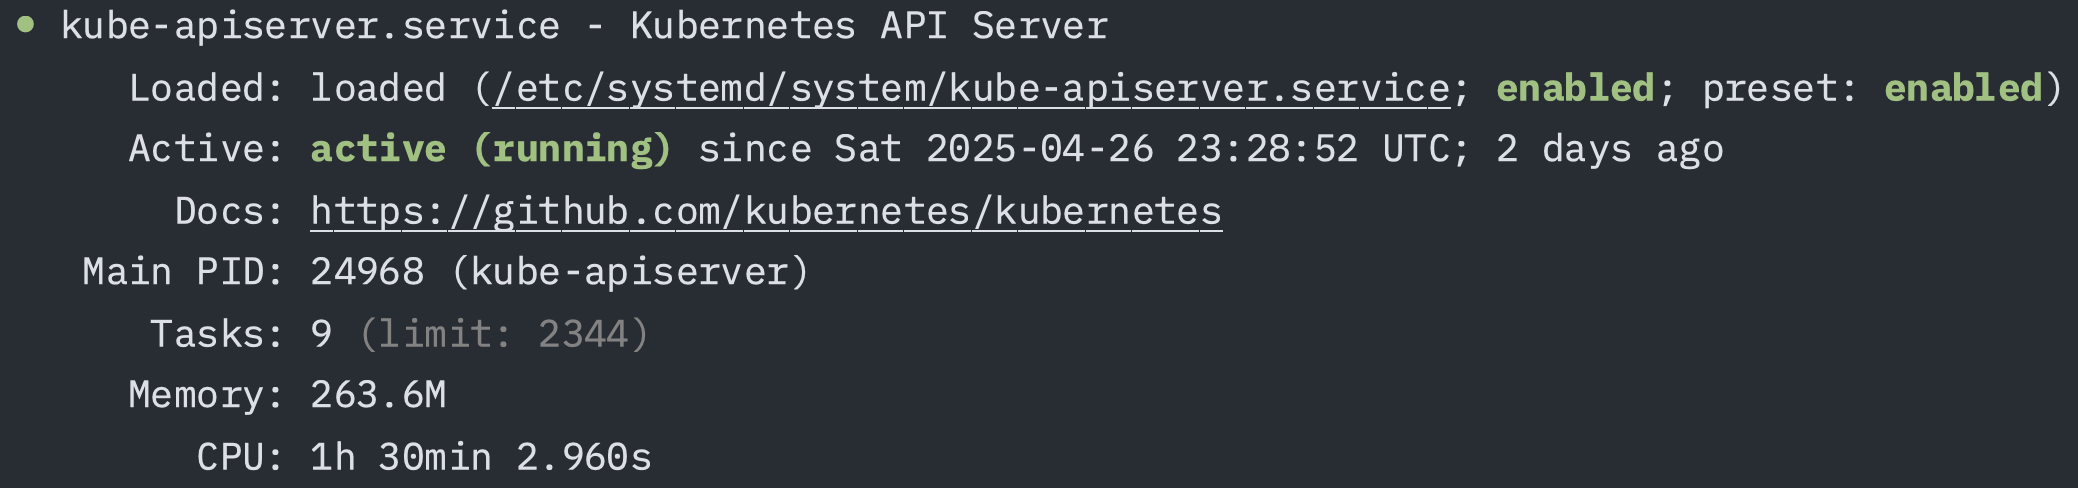
Part 2: Bootstrapping the Kubernetes Control Plane
Next, we need to set up the three core components of the Kubernetes control plane:
kube-apiserver: The API server that exposes the Kubernetes API and acts as the front-end for the control plane
kube-controller-manager: Runs controllers that handle routine cluster tasks. These controllers include:
Node Controller: Notices and responds when nodes go down
Replication Controller: Maintains the correct number of pods for each replica set
Endpoints Controller: Populates the Endpoints object (joins Services & Pods)
Service Account & Token Controllers: Create default accounts and API access tokens for new namespaces
kube-scheduler: Watches for newly created pods and assigns them to nodes based on resource requirements, constraints, and other factors
Let's examine some key configuration files and service definitions.
The kube-controller-manager Service
[Unit]
Description=Kubernetes Controller Manager
Documentation=https://github.com/kubernetes/kubernetes

[Service]
ExecStart=/usr/local/bin/kube-controller-manager \
  --bind-address=0.0.0.0 \
  --cluster-cidr=10.200.0.0/16 \
  --cluster-name=kubernetes \
  --cluster-signing-cert-file=/var/lib/kubernetes/ca.crt \
  --cluster-signing-key-file=/var/lib/kubernetes/ca.key \
  --kubeconfig=/var/lib/kubernetes/kube-controller-manager.kubeconfig \
  --root-ca-file=/var/lib/kubernetes/ca.crt \
  --service-account-private-key-file=/var/lib/kubernetes/service-accounts.key \
  --service-cluster-ip-range=10.32.0.0/24 \
  --use-service-account-credentials=true \
  --v=2
Restart=on-failure
RestartSec=5

[Install]
WantedBy=multi-user.target
This service definition shows how the controller manager is configured:
--cluster-cidr: Defines the Pod network address range
--service-cluster-ip-range: Defines the Service IP address range
--cluster-signing-cert-file and --cluster-signing-key-file: The CA certificates that sign other cluster certificates
--use-service-account-credentials=true: Makes controllers use separate service accounts
The kube-scheduler Service
[Unit]
Description=Kubernetes Scheduler
Documentation=https://github.com/kubernetes/kubernetes

[Service]
ExecStart=/usr/local/bin/kube-scheduler \
  --config=/etc/kubernetes/config/kube-scheduler.yaml \
  --v=2
Restart=on-failure
RestartSec=5

[Install]
WantedBy=multi-user.target
The scheduler is configured with a separate YAML file:
apiVersion: kubescheduler.config.k8s.io/v1
kind: KubeSchedulerConfiguration
clientConnection:
  kubeconfig: "/var/lib/kubernetes/kube-scheduler.kubeconfig"
leaderElection:
  leaderElect: true
This shows how the scheduler is configured to:
Use its kubeconfig file for API access
Enable leader election (important for HA setups with multiple schedulers)
RBAC Configuration
An important part of the control plane setup is configuring RBAC for the API server to access the Kubelet API:
apiVersion: rbac.authorization.k8s.io/v1
kind: ClusterRole
metadata:
  annotations:
    rbac.authorization.kubernetes.io/autoupdate: "true"
  labels:
    kubernetes.io/bootstrapping: rbac-defaults
  name: system:kube-apiserver-to-kubelet
rules:
  - apiGroups:
      - ""
    resources:
      - nodes/proxy
      - nodes/stats
      - nodes/log
      - nodes/spec
      - nodes/metrics
    verbs:
      - "*"
---
apiVersion: rbac.authorization.k8s.io/v1
kind: ClusterRoleBinding
metadata:
  name: system:kube-apiserver
  namespace: ""
roleRef:
  apiGroup: rbac.authorization.k8s.io
  kind: ClusterRole
  name: system:kube-apiserver-to-kubelet
subjects:
  - apiGroup: rbac.authorization.k8s.io
    kind: User
    name: kubernetes
This RBAC configuration:
Creates a ClusterRole that can access Kubelet APIs (for metrics, logs, executing commands)
Creates a ClusterRoleBinding that binds this role to the "kubernetes" user (used by the API server)
The tutorial mentions setting the Kubelet's --authorization-mode flag to Webhook. This is a critical security configuration that affects how the Kubelet authorizes API requests. When operating in Webhook mode, the Kubelet doesn't make authorization decisions locally. Instead, it forwards all authorization decisions to the Kubernetes API server by sending SubjectAccessReview requests.
The SubjectAccessReview API is part of Kubernetes' authorization framework that determines whether a specific user can perform a specific action on a specific resource. For example, when the API server wants to fetch logs from a pod via the Kubelet, the Kubelet will ask the API server, "Is this caller authorized to access these logs?" The API server evaluates this against its RBAC policies and returns the decision.
We will look at the kubelet in more detail when we set up the worker nodes in the next post.
Gotchas & Insights
During my implementation, I hit an interesting issue:
root@server:~# kubectl cluster-info --kubeconfig admin.kubeconfig
Please enter Username: admin
Please enter Password:
Error from server (Forbidden): unknown
I was being prompted for a username and password, which wasn't expected! Looking at the verbose output, I found:
forbidden: User \"system:anonymous\" cannot get path \"/api\"The issue was in my kubeconfig file. Earlier, I had set the credentials as:
kubectl config set-credentials system:admin \
	--client-certificate=admin.crt \
	--client-key=admin.key \
	--embed-certs=true \
	--kubeconfig=admin.kubeconfig
But the correct user should have been just "admin" (not "system:admin"):
kubectl config set-credentials admin \
	--client-certificate=admin.crt \
	--client-key=admin.key \
	--embed-certs=true \
	--kubeconfig=admin.kubeconfig
After fixing this, everything worked:
root@server:~# kubectl cluster-info --kubeconfig admin.kubeconfig
Kubernetes control plane is running at https://127.0.0.1:6443
I learned a valuable lesson: malformed or incorrect kubeconfigs can result in being prompted for credentials, and examining the error message ("User system:anonymous") was key to troubleshooting.
Understanding the API server's authentication and authorization process helped me troubleshoot the kubeconfig issue. Here's how it works:
Authentication: When a request comes in (like our kubectl command), the API server first determines who is making the request using:
Client certificates (what we used)
Bearer tokens
Authentication proxies
Webhook token authentication
Each request must pass authentication or be treated as an anonymous user (which we saw in our error logs as "system:anonymous").
Authorization: Once the user is authenticated, the API server determines if they're authorized to perform the requested action using:
RBAC (Role-Based Access Control) - Most common, what we configured
ABAC (Attribute-Based Access Control)
Webhook - Calls out to an external service
Node - Special authorizer for kubelets
This multi-layered security approach is part of what makes Kubernetes enterprise-ready. Our kubeconfig issue occurred at the authentication layer - the certificate was valid, but the username didn't match what the configuration expected.
Another key insight was about using `journalctl` to view logs. Since we are running the Kubernetes components using systemd, we get built in logging. But the default `journalctl` command does not make it easy to view the logs. I explore the man page and found some options that provide better logging.
# View all logs for a service
journalctl -u kube-apiserver

# View logs without pagination
journalctl -u kube-apiserver --no-pager

# Format output as pretty JSON
journalctl -u kube-apiserver -o json-pretty
The --no-pager flag is especially useful when you want to see all logs at once without having to press space, and json-pretty gives you nicely formatted JSON output that can be easier to parse.
Knowledge Check
Let's test our understanding:
Question: What's the purpose of etcd in a Kubernetes cluster?
Answer: etcd is a distributed key-value store that serves as Kubernetes' primary data store for all cluster state and configuration data. All cluster information is stored in etcd, making it a critical component.
Question: Why does each etcd instance need a unique name in a cluster?
Answer: In a multi-node etcd cluster, each instance needs a unique name for proper identification during cluster formation and consensus operations. This helps etcd track cluster membership and maintain quorum.
Question: What would happen if your kube-apiserver couldn't communicate with etcd?
Answer: If the kube-apiserver can't communicate with etcd, the entire Kubernetes cluster would become non-functional. You couldn't create, read, update, or delete any resources since all state information is stored in etcd.
Question: Why does the API server need access to the Kubelet API, and what kinds of RBAC permissions are typically needed?
Answer: The API server needs to access the Kubelet API to retrieve pod logs, execute commands in containers, perform port forwarding, and collect metrics and status information. Typical RBAC permissions include access to resources like nodes/proxy, nodes/logs, nodes/stats, and nodes/metrics with appropriate verbs like get, list, and watch. Without these permissions, kubectl logs, kubectl exec, and kubectl port-forward commands would fail.
Wrapping Up
In this tutorial, we've successfully bootstrapped etcd and the Kubernetes control plane components. These elements form the "brain" of our Kubernetes cluster, making all crucial decisions about the cluster state.
We've learned:
How etcd stores cluster state
How the API server, controller manager, and scheduler work together
How RBAC grants necessary permissions between components
Debugging techniques for control plane issues
In the next part of this series, we'll bootstrap the worker nodes, which will run our actual containers and bring our cluster to life!
Remember that understanding these components at this level gives you powerful troubleshooting abilities when things go wrong in production. You'll know exactly where to look because you've built it yourself!
What are your thoughts on the bootstrapping process? Did you encounter any challenges? Let me know in the comments below!